Showing posts with label DIY. Show all posts

Wednesday, January 2, 2013

How to Fall in Love with Your Home Again


I've had some extensive time off during the holidays and one of the things I've been doing too much of is watching TV, namely HGTV. It doesn't take many episode of House Hunters and the like before I want to smack someone upside the head and show them that their current home, or the smaller home they dismissed out of hand, could be perfectly fine with just a few small adjustments.

I shouldn't be so hard on those poor House Hunters participants; falling out of love with your home happens to most of us at one time or another. Remember when you first saw your current home? When you first fell in love with, or were at least perfectly satisfied, with your home? Remember when it was new (to you at least), exciting and full of possibilities? But eventually that newness wears off and we begin to take our homes for granted. Maybe they put on a few pounds, perhaps they haven't kept themselves up like they used to, perhaps old age is taking its toll. Eventually homes can begin to seem a bit sad, cluttered and neglected and the siren song of moving up to a bigger, newer, shinier, better home might begin to appeal to you. But before you start packing, you might want to try a few easy tips to fall in love with your home again.

  1. Clean up - Sounds too simple to work? Perhaps, but a clean, tidy home is much easier to love. Whenever I'm feeling especially down on my house I give it a good scrubbing and inevitably it always looks vastly improved afterwards.

  2. Declutter - You've heard it before and you'll hear it again, because it's true. Decluttered spaces feel and look larger. So put your house on a diet and get rid of some of the crap you no longer use or love, and see what a difference it can make in your home. Visit the clutter busters category of this blog for more decluttering inspiration.


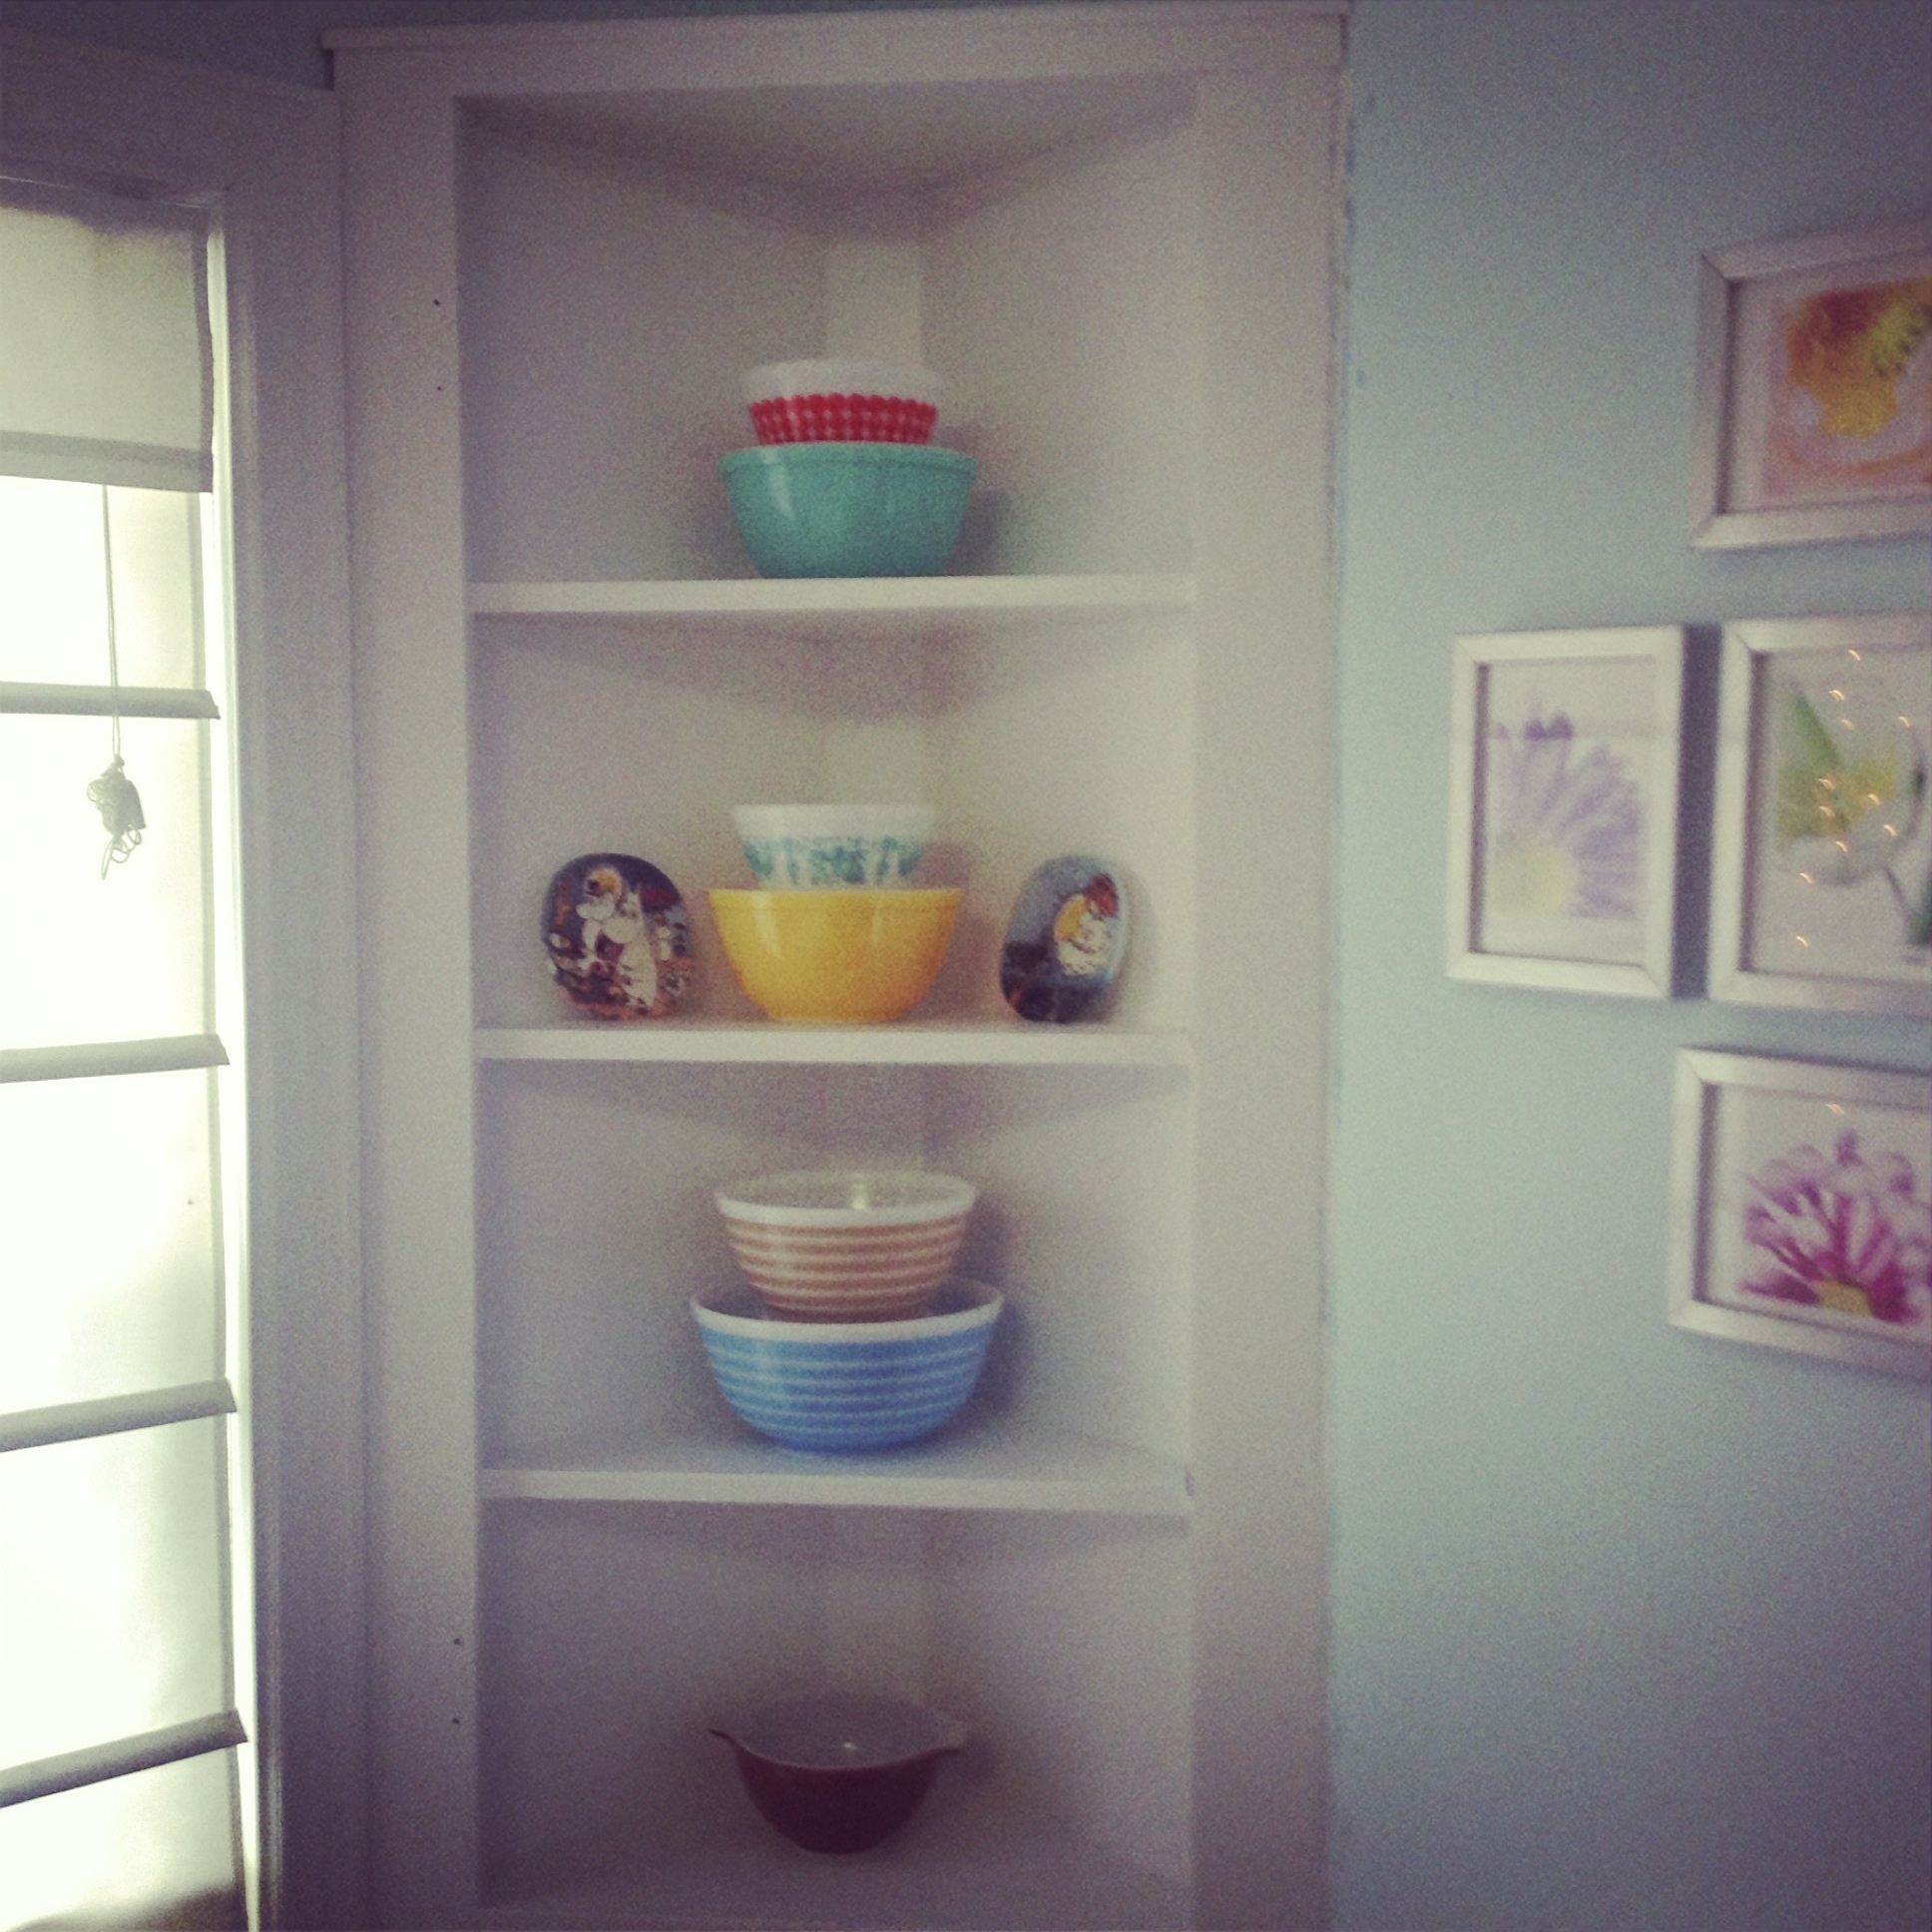
    this corner cabinet is one of my favorite areas to rearrange
  3. Rearrange - I'm not a serial rearranger, but I am always impressed with how happy rearranging things in my home can make me feel about the space. First we get used to our surroundings and then we get bored with them. By simply rearranging some of your trinkets and decor, you can make your space feel fresh and new again. You can go hard-core and rearrange the furniture (if you have the space), but even changing out pictures or changing a shelf arrangement can make a big impact.

  4. Fix it! - Most homes having something that needs fixing. Whether it's a nail hole that needs patching (ahem, like in my living room), a messy space that needs an intervention (hello, basement!), fixing something that has been bugging you not only gets a nagging item off the to-do list, it can make you feel better about your home as well.

  5. Add a little something - If you've completed the first three tips and your home still doesn't make you smile buying one or more new, strategic pieces can make a big difference. Whether it's new pillows that really pop for your couch, or a new throw for your bed, the right small touch can make a big difference. You don't have to spend a lot of money to achieve a new look either, shop a sale, use a coupon, buy used (via thrift stores, garage sales, Craigslist, etc.) or make something.

  6. Paint - I am continually amazed at what a big difference a new coat of paint can make (example 1, ex. 2, ex.3, ex. 4, ex. 5). Compared to most remodeling jobs, painting a piece of furniture, room, trim, etc. can make a big difference in how you feel about your home. Paint can also help you live with something that is less than ideal while you save up for what you really want (I'm looking a you, fake tile walls).
What tips and tricks help make you fall back in love with your home?

Sunday, December 2, 2012

Cabinet Painting: Gun, Brush, or Roller, Choose Your Weapon

It's a lovely 60F day in Ohio in early December, and I'm glad it's raining. Why? So I have an excuse not to spend most of the day sanding and painting cabinet doors, guilt free. When colleagues and friends ask what we did over the weekend and I reply, again, painting cabinets, their overwhelming response is, 'you're still painting cabinets?' Yes, yes we are, and we've still got a long way to go-- at least five more coats on some doors. ARGH! I just want the doors to be done and back in my kitchen already.


Of course I have no one to blame but myself. This is what happens when you start a painting project in fall that has to be done outside and you live in the northern hemisphere. With the short daylight hours and the late fall temps, we're only able to paint one coat per day if we're lucky.

We could be done by now if we'd (a) started earlier or (b) were willing to paint the doors with a brush or roller, which could easily be done indoors, anytime. I tried to brush and roll the doors, I really did. This is part of what made this project take so long. First I tried Benjamin Moore Advance paint, because I saw rave internet reviews about how well it self-levels while still being water-washable. I brushed it as carefully as possible, tried rolling it with three different kinds of mini-rollers (they don't call me a perfectionist for nothing), but we weren't that impressed with the results, especially not for the price.

Then we tried Cabinet Coat, which leveled much, much better. On a small area with a carefully applied brush  Cabinet Coat looked almost sprayed on. When dealing with an entire cabinet door we couldn't quite replicate those results, but it was still an improvement over the Advance. I figured the painting application issue was resolved and we started moving forward.

Then we had a chance to borrow and try an airless paint gun from friends. You can read more about that here, but basically, the airless spray-painted results were amazing, but so was the mess caused by the overspray. After seeing the smoothly-painted surface achieved by spraying, however, the idea of going back to brush marks was very unappealing. Luckily, the boyfriend was able to borrow an HVLP gun from work, and finally we had our answer.

In the meantime, while between borrowed paint guns one day, I tried a hybrid solution. I rolled on primer, which we could do inside before spraying the finish coats. That was a DISASTER. I used those little, white high-density foam rollers that other DIYers rave about. I must say, I don't get it. The results were just awful. Am I just super sensitive to the texture rollers cause or am I a rolling buffoon? I don't know, but the resulting texture on the doors resembled the peel of an orange and it took 80 grit sandpaper and an electric sander to get all that blasted texture off so we could re-spray them. If I wasn't able to spray paint the doors, I would brush them, no question. Those little white foam rollers are pure garbage.

these are the devil - avoid them at all cost

So when it comes to painting cabinets, for best results, my solution is:

  • Spray-paint with an HVLP
  • Use Cabinet Coat
  • Don't wait until fall
What's your recipe for painting success? And if you love those dastardly foam rollers, what's the secret to using them?!


Tuesday, October 23, 2012

Update: The World's Longest Kitchen Reno


Well, I did manage to finish painting the kitchen cabinets (cabinets only, not the doors) during my week off. If you missed my earlier whining, it was six fun-filled days of sanding, scrubbing, scraping and, oh yeah, a little painting. And afterwards I didn't touch a paint brush or piece of sandpaper for nearly three weeks.

I guess I was suffering from DIY overload. Still am really.

I love seeing the bright white cabinets, however. So much better than that hideous midnight blue.

the before
But there's still the issue of all those drawers and doors. Living without them has just proved that I really couldn't live with all open shelving. Seeing all that stuff all the time drives me NUTS.


But apparently not nuts enough to rush the door paint job.


I finally got back on the horse this past weekend and we tackled the trim issue. When I say we, I mean the boyfriend. After a post-work sanding session last night, the doors are almost ready for paint. Just in time for a cold snap. Did I mention the unheated garage is our makeshift paint studio? Maybe I shouldn't have procrastinated quite this long. Sigh.

Friday, September 28, 2012

Getting Real About DIY: Painting the Kitchen Part I

The before: the navy blue light-sucking interiors must go.
Zoom in if you love chips and peeling paint!


Today is my last day of a week of vacation, but it felt more like time served for bad behavior. My crime? I decided to repaint my kitchen cabinets, a critically-needed step in the world’s longest kitchen reno.
This wasn’t a spur-of-the-moment decision. I’ve hated the navy blue insides of these cabinets since I first saw them when touring the house. They just suck all the light out of the room and are hideous. But worse than that, is that the white paint covering the outside of the cabinets was chipping and wearing off -- not a good look.

So the big paint job started on Monday. In retrospect, I should have started earlier and done more over the weekend. I did some packing and removed some of the shelf liners, but there was much, much more prep to be done.

Here’s the thing about DIY. Most TV shows and blogs gloss over the gory details. I mean sure, we all know projects take longer than the 30-60 minute show, and way longer than you plan for them to take, but who talks about just how horrid they can be at times? For the amount of work involved, I think there is far too little whining going on. Cause kids, this stuff can really suck. Taking painting kitchen cabinets for instance. I’ve been working on my kitchen about as much as I do at my regular job each day, only the kitchen work is much more physically demanding. It’s also messy, disruptive and causes you to need to bend in weird ways for long periods of time, which for me equals a lot of soreness. Which calls for a lot of booze, purely for medicinal purposes of course.

Here’s the breakdown of the work so far:

What chu doin to my kitchen, Willis?

Monday - Finished packing and emptied pantry. Have various kitchen crap stashed throughout house. Removed all hardware (by hand cause I can't find the darn drill!), doors, latches, drawers, and shelf liners (the adhesive kinds of shelf liners are the devil!). Used half a bottle of Goo Gone trying to remove the adhesive from those devilish shelf liners. Can we all just agree to never use those again? Finally, hung plastic and started sanding in the afternoon. After work the boyfriend removed some molding, filled holes and gaps and made a couple trips to the home improvement store while I continued sanding.

Tuesday - Spent five more hours sanding and scraping cabinets! That’s a helluva lotta sanding people - I ended up looking rather smurf like and was covered in blue dust. This included an inordinate amount of time spent trying to sand off remaining adhesive from those blasted shelf liners. Stop the insanity with the shelf liners! Started cleaning around four in the afternoon and finished wiping every cabinet, surface, appliance and mopping floor around 7:30 p.m. before hobbling to the shower.

Wednesday - Scrubbed cabinets with TSP for FIVE HOURS. Spent a ton MORE time scrubbing off remaining #%$(^U*(!!! adhesive. Dreamed of ways to kill whomever put down the damn shelf liner in the first place. Used de-glosser liquid to de-gloss a few more spots that I couldn’t reach with sander. Finally started painting around 4:30. Boyfriend came home and helped me paint for a few hours, and thanks to that we got a primer coat on everything but two cabinets. The carpal tunnel is really kicking in tonight, hoo boy.

This is also when the cats really started to rebel at being trapped in the basement. I don't understand it, there is an entire other living room down there, it's hardly Alcatraz, but they scream bloody murder half the day. At one point I thought someone had broken in and was dismantling the basement, but no it's just a pissed-off cat apparently attempting to shake the door of its hinges. Door wins, for now.

We's exhausted!

Thursday - Took the morning to recoop, but still managed to get a second coat of primer on all the cabinet boxes. Was starting to feel better about things, but then I remembered I haven't even touched the 14 doors and 4 drawers that need to be painted before kitchen is really back to normal. Beg boyfriend to go get more booze so I have beer to cry into.

Friday - Sanded and scraped a few drips from priming (oops). Time for the real paint which is exciting, but my motivation is at an all time low. Tried out a new roller cover and the results almost made me cry they were so horrid. The thought of two more days of painting is almost more than I can take. Finish getting coat of paint on cabinets thanks to help from boyfriend but am dismayed that vacation is officially over and I have at least another solid day of painting left. Dear god let it end soon.

----to be continued....if I make it.....

Friday, May 25, 2012

Pantry Sneak Peek II

Wow, it's been awhile since I reported on the pantry progress. We're coming towards the finish line now, but I'm going to catch the blog up. When we last left the pantry, it's bare bones were up.

Next the boyfriend made doors that are a pretty exact match to the rest of the 1950s kitchen cabinets.


It's already looking so good, but we have many more plans to come!

Thursday, April 26, 2012

Pantry Sneak Peek


It's obviously not done yet, but didn't the boy do a lovely job on the pantry? Still to come are pullout drawers for the bottom half and doors. This weekend I start painting!

Until then, I can't stop daydreaming about organizing this puppy. That's a whole lot of new storage space! It's going to make a big difference in this little kitchen.

Oh, and yes, that is a cat on the counter. No, he's not supposed to be up there, but he pays absolutely no attention to the rules anymore. It's like once he turned, oh I dunno 13 (he's 15 now), he became one of those old men who, fed up of a lifetime of following the rules, finally do whatever the heck they feel like it, whenever they feel like it. Now we're just happy whenever he's not howling with displeasure at something.

Tuesday, April 17, 2012

Smells Like Renovation

As I walked into the back door this evening I was greeted by the smell of burnt Pergo flooring, which can only mean one thing. The great kitchen reno has begun!

Why would a kitchen renovation begin with burnt Pergo? Why not?! But seriously, the Boy had to remove a chunk of the hideous Pergo floor so that he can build a very-coveted pantry cabinet (oh boy, oh boy, oh boy!) and apparently there was an issue with a dull blade. Don't worry, no actual flames occurred. 


I completed my own small reno preparation as well. As part of the renovation we will be removing an added on portion of lower cabinets and countertop. It wasn't original to the kitchen and takes up precious dining space, so out it goes. This change means losing some storage space, most of which will be regained in other areas, but we are losing three drawers. And kitchen drawers are rather handy. So in an effort to prepare for a major drawer-downsizing, I combined this:


with this:
and got this:

So that's one down, and a million steps to go.

Tuesday, May 31, 2011

Hallway Makeover

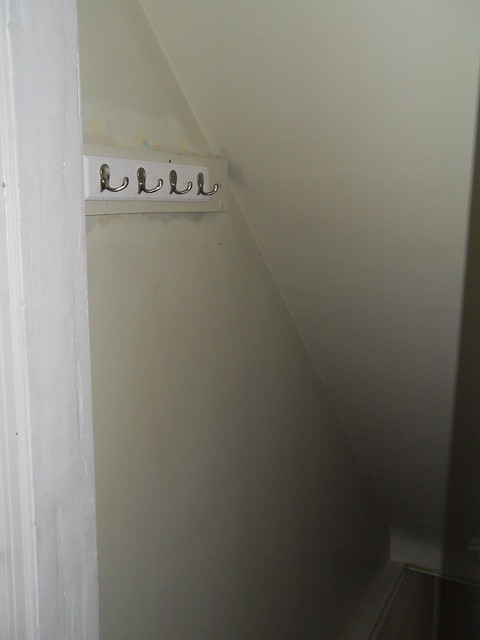
Over the last two weekends we spent some time revamping the basement hallway. Not only was the hallway painted a hideous greige color, but it also wasn't as functional as I hoped it could be.

See, the basement hallway is right off the back door, which we use as our primary entrance. My house seriously lacks entry space. The front door opens right into the living room; no foyer, no entryway, certainly nothing as convenient as a closet. Just the front door right in the frick in the middle of the living room.

The back door isn't much better. It opens directly into the kitchen. There's no sun porch, no mudroom, no closet, just a teeny bit of space next to my "pantry" and a hallway to the basement.

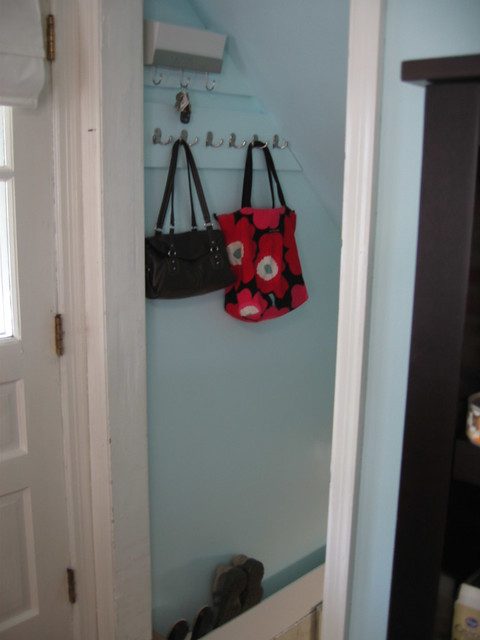
I have been ruminating over how to transform the hallway to add more storage, especially shoe storage, for months now. Finally, I decided to get off my duff and go for it. Then in a 10-minute consultation with the Boy, we solved the shoe storage issue as well. After some carpentry work by The Boy, and painting by me, we turned an eyesore into a wonderful blanding strip (basement landing strip).

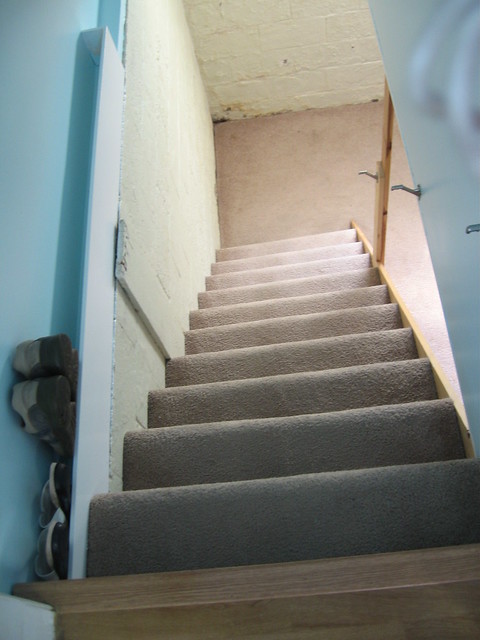
The shoe storage was made by adding a board to an existing ledge. It's MUCH better than having shoes pile up in the middle of the floor.

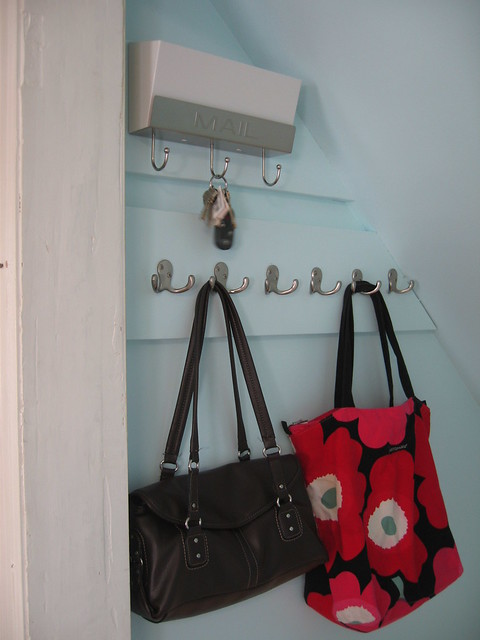
We also added key and mail storage, and more hanging space.


What you can't see in the before pic, is that we removed the bifold double door to the basement which was never used anyway. The entire space feels much more open now, and I love the continuation of the kitchen color in the hallway.

Did I mention no more piles of shoes by the door? Bliss.

Saturday, May 8, 2010

Living Room Redo

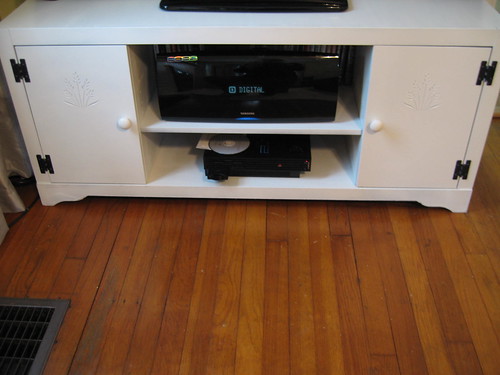
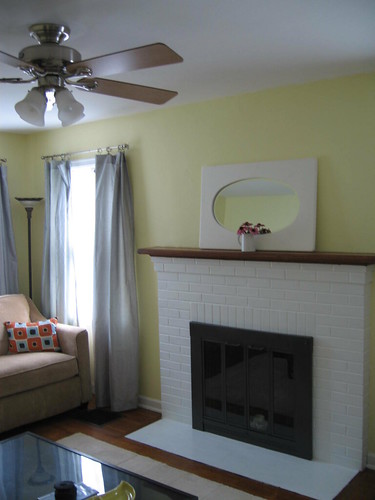
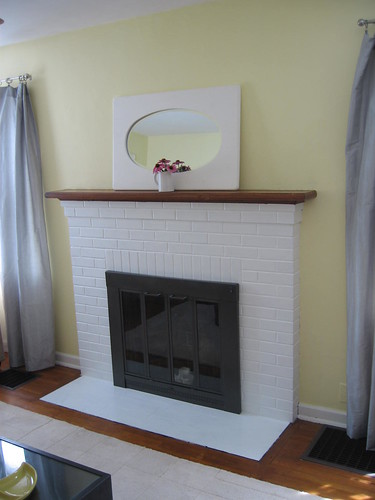
Yesterday the boyfriend completed a mini-makeover in the living room so we could move the new TV in. This spot used to be the weak point of the living room, but now it makes me happy.

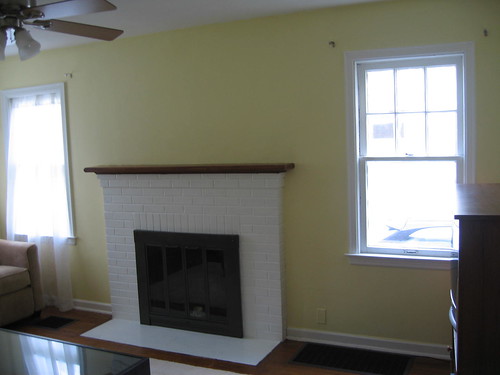
It's fun to look back and see how the house has evolved over the five years I've lived here (five years, wow!). But don't just take my word for it. See how this same spot looked two years ago.

This was before the fireplace makeover. And would you believe that that's the same entertainment center in this pic as the ones above?

Yep, it is. I couldn't find a new TV stand I liked, so the boyfriend cut off the top, spray-painted it white and attached new knobs. It looks so much better it's hard to even tell that it's the same piece. Plus,it saves it from going to the landfill. It's a win-win.

Sunday, February 28, 2010

DIY Fail: Cleaning Wool Rugs with Snow

A few weeks ago I spotted this Apartment Therapy post on cleaning a wool rug with snow. Brilliant!, I thought, I have a rug in desperate need of cleaning and now can finally put all the god-awful snow we've received to good use. I excitedly sent the link to the boyfriend. Go for it, he said.

But first I had to wait for fresh powdery snow. Mother nature obliged and on Saturday morning I hauled the rug shown above outside to clean. The boy and two of our three cats crowded into the kitchen window to watch the show, and what a show it was. I beat the stinkin' rug until my arms hurt (which took about 180 seconds) and then kept beating it. I flipped it over, dismayed not to see oodles of dirt in the snow, and flipped it again. Then I ground some snow in to the front for good measure to try and get more stains and dirt out. Didn't work.

Eventually I gave up and hauled the rug back up to the deck, hung it over the railing and beat it some more to try and get the excess snow off. My still-stained rug was now wet to boot, so with the boy's help I dragged it inside, into the basement and we hung it on the basement clothesline and I proceeded to consider the entire ordeal a giant bust.

The boyfriend jumped on his white stud of a computer (okay it's really black, but that didn't fit the analogy, now did it?) and called the rug cleaners and found a place where we could drop off the rug that day for cleaning for only $17. And that's where we stand until Monday, when I see if anything can save that darn rug.

To be fair, I did screw up on a few accounts:
  • It wasn't cold enough. The directions state to clean the rug on a day where it's well below freezing, which is wasn't, but patience has never been one of my virtues.

  • Grinding snow into the rug didn't help get out any stains and only contributed to the wetness issue.
Lessons learned: Don't use oxy-anything to clean a wool rug and when it needs a good cleaning, save yourself some agony and just take it to a rug cleaner already.

Monday, February 15, 2010

It's About Time: My Art Gallery Wall

I have a specialized form of trypophobia, or fear of holes, in that I only fear putting holes in my plaster walls. Ok, I don't have a real phobia, but it does sometimes take me, um, years to commit to putting art up. Case in point, despite buying several pieces of art, I had not hung a single picture in my living room in five years, until now.

Yes, I jumped on the gallery wall bandwagon, albeit a few years late. That's one benefit of living in Ohio, trends hit years later if at all. So a couple of weeks ago, after a lot of plotting and planning, I was finally ready to hang some art. I figured out my favorite arrangement (after trying every possible combination, believe you me) and the boyfriend did the dirty work of measuring and drilling. Then ta-da, instant gallery wall. I'm amazingly happy with how it turned out.

About the art:
  • The large piece of art is a Marimekko tea towel in an IKEA Ribba frame, an idea I got from Anna at Door 16.
  • The two square pieces are several years old, from IKEA.
  • The blue flower is a print I got a few years ago from a local art/craft show.

Saturday, December 12, 2009

Snowflake Curtain: A Craft Project Even I Can Do

photo by Laura (aka Lupin) of Bugs and Fishes by Lupin

I've always enjoyed making paper snowflakes around the holidays, but I never found a really great way to display them, until now. Last week was stressful, to put it mildly, and spending an hour working on the beginnings of my own snowflake curtain was a great way to chill out. I'm sure mine won't look as great as my original inspiration from Bugs and Fishes, but this is a cheap, easy holiday craft anyone can do.

Saturday, December 5, 2009

Light It Up

Don't you love finding out about other people's habits and how they live their lives? I know I do, and not just about the big things, but also about minutiae, like, say, lighting habits. Do you ever drive down the street and notice leaves porch lights on all day and night, who has no lights on, who has every light on, etc? I know I do, but then again I'm nibby like that.
I started thinking about lighting again after reading Ana @ Rearranged Design's post Leave a Light On and I wanted to share my lighting habits, especially since they've recently improved.

The Icky Before

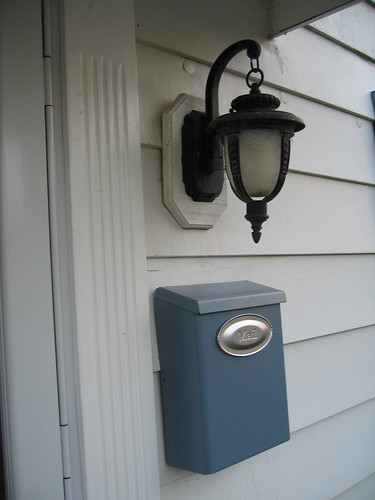
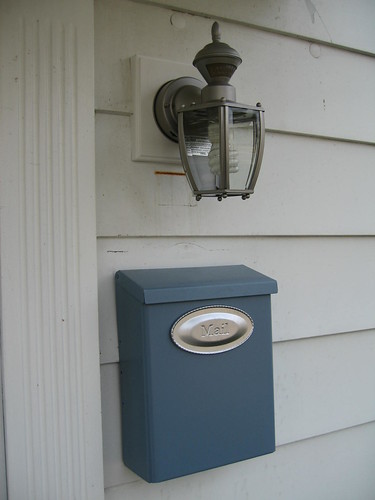
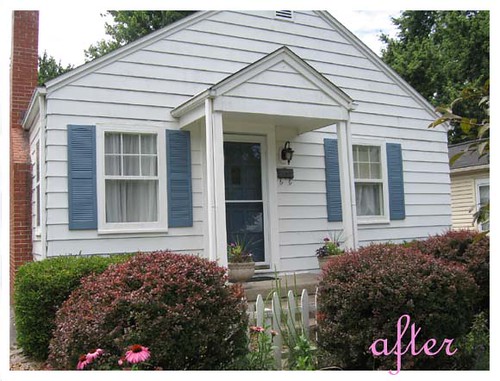
The exterior lighting situation has improved a lot in recent years thanks to my handy boyfriend. Now all our exterior lights are the motion detector variety, and use CFL bulbs, including three new, awesome motion detector sconces which turn on when there is movement, but can also be set to stay on continuously. Thanks to these babies I no longer waste electricity, come home to a dark house or forget and leave the light on for 48 hours straight, plus they're on whether I'm home or not. And they're pretty nice looking, which was a bit of a challenge, at least on a budget. *happy sigh*

After!

On the inside I have one light on a timer, which is also awesome, plus we leave a small CFL kitchen light and a basement light on for the cats, who the boyfriend insists cannot see and get scared otherwise. I used to make them live in darkness, but now I feel guilty so the lights stay on.

That's the lighting story around min hus, what's yours?

Sunday, August 2, 2009

Fixing the Leaks: How I Got My Living Room Back

During my first two weeks off I spent the vast majority of my time doing projects around the house, mainly a lot of scraping, paint preparation and a little painting. Most of the results wouldn't stand out to the average min hus visitor, but they do make the place look a little brighter and cleaner.

One fix does make a pretty big difference however, and it's the project that pushed me into project overload: fixing the leak damage in the living room. Long story short, the living room has had a moisture problem for, oh, way too long. It was an extremely slow leak, but over time it did some ugly damage.

So why did it take me so friggin' long to fix the leak? Well, it was way above my knowledge level so I turned to family, friends and finally a roofer for help. Multiple quick fixes were tried and failed. Many inspections and estimates were obtained and finally, I hired a roofing company to redo the chimney flashing (in two spots). I'm still shocked they didn't say I need a new roof, let's hear it for honest roofers.

And while I'm still not convinced the roof leak is 100% fixed (call me pessimistic, but if it's not fixed, I'm pretty sure I know the cause and a fix is already planned), I couldn't stand looking at the damage any longer. Really, I can't even guess how much time I've spent glaring, cursing and crying because of that wall. Oi.

So on Wednesday I finally started scraping all the loose paint and whatnot off. The area under the window, which had cracked paint, was the worst. The layers of paint came off pieces so large that I literally got nauseous. Fortunately, feeling nauseous is a common occurrence for me during projects, and it's only since I've survived it several times that I was able to not cry, freak out and call for reinforcements. The damage was so bad in fact that even the boy thought I'd gotten in a little over my head when he came home and saw with the first coat of patching compoun applied.

After a lot of scraping, and a little panicking, I patched the wall, sanded, patched, sanded and finally painted. This took two and a half days (lots of drying time is required of course) and brought me to the end of my project patience, but in the end it was worth it. Yesterday I celebrated by deep cleaning the room and house, doing some small rearrangements and then calling an end to all projects for the rest of the weekend. Aaah!

My patch job isn't perfect, but I'll worry about that after I know that the leak is completely banished. For now I can once again sit in the living room and relax.

Even the scary patch under the window looks good again!

Saturday, July 18, 2009

The Neverending Summer To-Do List

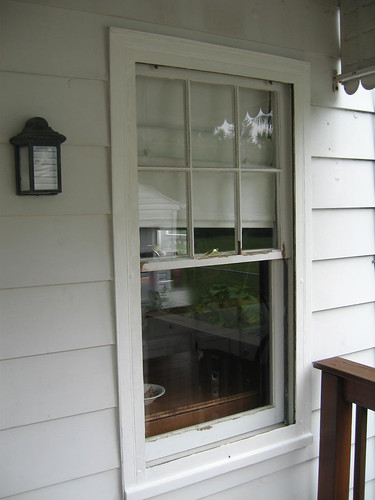
Restoring nine windows is just one
of the projects on my to-do list.

Thanks to a job change, I'm lucky enough to have some extended time off this summer for traveling and hopefully tackling some of the things on my never-ending to-do list.

This brings up a topic I struggle with almost every weekend, do I spend free time doing projects, planning for proiects, relaxing and having fun or trying to squeeze in all three? I'm not good at balance; instead I have a bad habit of becoming singularly focused on big projects and work myself ragged until it's done. All of which makes for a very unfun and tiring vacation, weekend, etc. Then I'm not able to find the motivation to do another project for a long time.

This time, I'd really like to strike a balance between getting things done, and still having fun even when I'm home. Anyone who has tips on how to do that, please share! So far I'm thinking: take some time off during the day to do things I don't have time to do when I'm working (eating some breakfasts and lunches out, making a nice lunch for the Boy and I, going to a movie during the day, going swimming, etc.).

But without further ado, here's my list. I'm sure there's still more on it than I can possibly accomplish, even though we've started a few things already and even finished one or two.

Inside:

  • Pick out a new AC
  • Fix living room walls and repaint (Done!, but it almost killed me)

  • Fix bedroom ceiling and paint
  • Finish patch in kitchen
  • Touch-up bathroom paint and paint window
  • Patch and paint bathroom door
  • Hem bedroom curtains
  • Frame and hang art in living room
Outside


  • Stain deck, see it here!
  • Paint/restore three or four windows and storms (two will have to do)
  • Paint front door and shutters (Done!)
  • Paint awnings (or at least fix the horrid rusty one!)
  • Paint garage doors
  • Remove hideous bushes by driveway(done! thanks to the Boy)
  • Patch and seal driveway (The Boy said he'd do this one on his break, yay!)

Sunday, July 5, 2009

What's No Longer Black, White and Purple All Over?

Well, it took almost the entire day and caused more than a few fights, but we can strike another project off the summer to-do list: painting the front door and shutters. I've wanted to tackle painting the black shutters and hideous purple door since I first saw the house, and thanks to the Boy, it's finally done. Now min hus stands out from the other neighboring white houses with black shutters.

I'm happy with how it turned out, but oh so tired. I really hope I never have to strip that much paint off of anything ever again. I'll post more details (probably) when I have more energy.

Friday, July 3, 2009

Who's Afraid of the Big, Bad Door? A Scary DIY Tale

Grab a pillow, boys and girls, and make yourself comfortable, today I'm going to tell you a scary story about a boy, a girl and a DIY project.*

It all started, as most scary stories do, with a simple, but flawed plan. The boy and the girl planned to go shopping and buy supplies, strip and paint their front door, and clean and paint their shutters. All in ONE day. They foolishly forgot the DIY golden rule: all projects will take four times as long and cost three times as much as planned.

"We'll easily be able to finish this in one day," the silly boy exclaimed.

The girl was not convinced, so they did some preliminary window-shopping the night before. All was well until suddenly the girl sprouted a second head! And not just any head mind you, but a grouchy, snarling, hungry witch's head! The witch put a spell over the girl, so that to anyone else it looked like she was still her usual self, but she wasn't. Suddenly the girl started snarling and snapping at the boy when he didn't find the paint stripper fast enough. The boy snapped back about her painting choices and a fight ensued. Finally, the girl was able to overpower the witch and cut off her head. The boy and the girl managed to make up and go to sleep dreaming happy dreams of a successful project. (the fools!)

The next morning the girl got up, made coffee, and tried not to dread the work ahead. Later, the boy and girl went to a discount home improvement store. They found door hardware at half the price of what was at the nasty box store. This made them happy, but they still had to go to the big, nasty box store. The paint section proved tricky again, as the girl had a minor panic attack over picking a paint sheen and annoyed the paint guy. But eventually the couple got their purchases and headed home.

This, boys and girls, is where the real trouble began. First, they discovered that someone evil had painted over the same hinges and screws they needed to remove to begin their project. Eventually, they unhinged the door and removed the old hardware. Then, they soon realized that if they installed the new hardware where the old mortise lock had been, they'd be left with a huge, gaping hole in the door. This worried the girl terribly. She started stripping the paint off the door and it wasn't going well. Morning had faded into afternoon.

Suddenly the evil witch gathered all her magical powers and regrew a head on the girl's body, and all hell broke loose. The girl began hyperventilating as she realized they'd never finish the door that day, let alone the shutters. She also panicked about the right way to fix the hardware problem quickly. The boy wanted to ride off into the sunset to slay the evil lock problem, but the girl knew she'd never finish the door alone. She began yelling and pacing and came quite close to crying. The boy thought she was having a nervous breakdown. They fought and swore they'd never do DIY together again. It began to look like the evil door and witch had won.

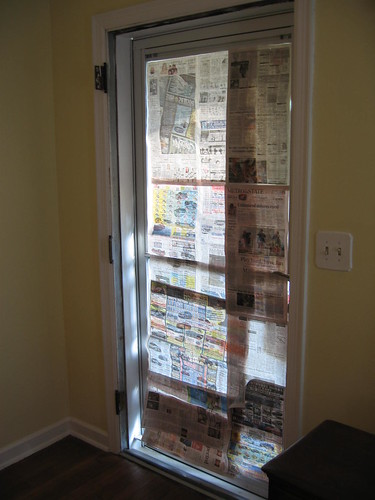
Eventually, the girl slayed the evil witch and the boy and the girl calmed down. The girl apologized, and the boy made her repeat it several more times as they spent the next SIX HOURS scraping that stupid door and removing all the old paint. Both of them feared they had fallen into a time warp, because how could it possibly take SIX FRIGGIN' HOURS to strip a door? But by that time, it was dark, and they were dirty, hungry, sore and tired. So the boy and the girl went into their cottage and slept. Without a front door. Oh don't worry boys and girls, they had a great security system in place of the door consisting of a locked storm door, a $1 alarm that would sound at the first sign of trouble, a bunch of newspapers (to block evil, prying eyes) and a vacuum (to booby trap any wannabe criminals).

As for the evil door? And the shutters? Stay tuned kids, stay tuned.

* I'm sure it goes without saying, but this tale is purely fictional. It has nothing to do with reality. Any similarities to real people, real huses and real DIY projects are purely coincidental. And anyone who says otherwise is LYING.

Wednesday, July 1, 2009

Tired, But Satisfied: Getting Back in the Thick of It

window before

I rarely feel like a "real Houseblogger," those renovation enthusiasts at Houseblogs.net who tackle major project after major DIY project, without pause. You know, the people who totally renovate their entire house, room by room, in a year or so. While I love reading those blogs, sometimes they make me feel extremely inadequate, not to mention jealous.

It's not just bloggers either, my stepdad has been spending almost every free moment he has for OVER A YEAR renovating a house. They took that place to the studs and brought it back. Yeah, that's not me.

I'll go all out on larger projects until they are done, because unfinished project chaos drives me NUTS (though there are some things I manage to ignore for weeks or years), but after they're done I need a nice, long break before I can even contemplate another project. I'm just one of those people who needs major doses of R&R every week. Min hus is on the "never going to be totally finished and will look its best before I sell it" plan.

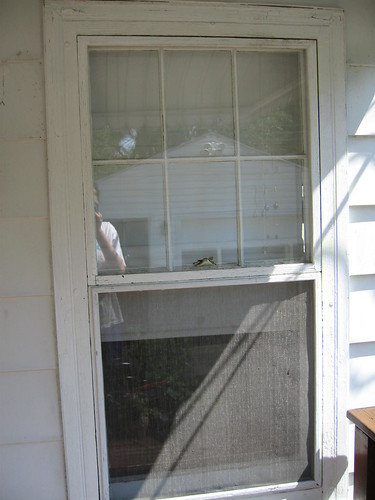
Case in point, the reason I felt so satisfied this weekend, despite my aching body, is that I finally got back to restoring the windows after a two year break. This summer my goal is to restore four windows, though that may be optimistic. Last Saturday, I finally got started, and managed to scrape (using a heat gun) the paint off the trim of one window, and repaint it. It took about four hours and the project is only half done, if that, as I still need to reglaze the window, paint the window, and repaint the storms.

window during

While the caulk and wood filler was drying, I managed to clean the back stormdoor, light and deck; and do some gardening. Meanwhile, the Boy spent the day working on his own projects in manland. By the end of the day I was exhausted, and even though I had to pop some ibuprophen the next day, I felt great, almost like a real houseblogger.

window after

Our faithful companions were as helpful as usual during the day's work. Here's Piggy, being his usual supportive self. (check out that belly. His fur never grew back after he was neutered, it cracks me up.)

Saturday, June 27, 2009

A FAB Kitchen Makeover

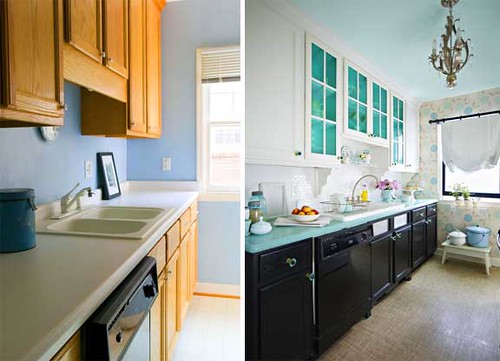
You may have noticed that I'm obsessed with all things kitchen lately as I dream about transforming my kitchen to something fabulous on a tiny budget. That's why makeovers like this fabulous and creative one by Meredith Ladik are so inspiring to me. I love the bright pops of turquoise, the rich-looking bottom cabinets and the pretty wallpaper.

Get the scoop and see more pics at Do It Yourself (originally spotted on Casasugar). And come back for pics of my kitchen makeover, hopefully coming sometime before 2012 at this rate (I hope!).

Saturday, June 20, 2009

Sometimes It's the Little Things: Bathroom Storage

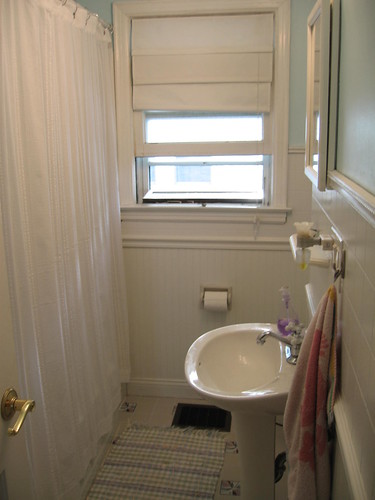
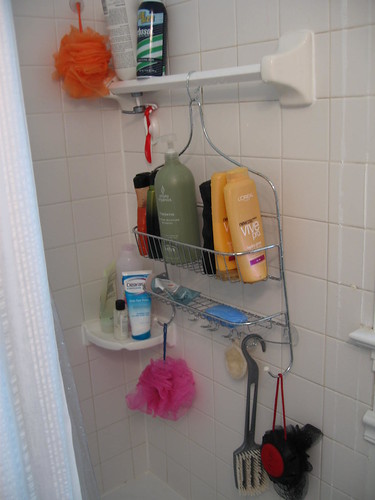
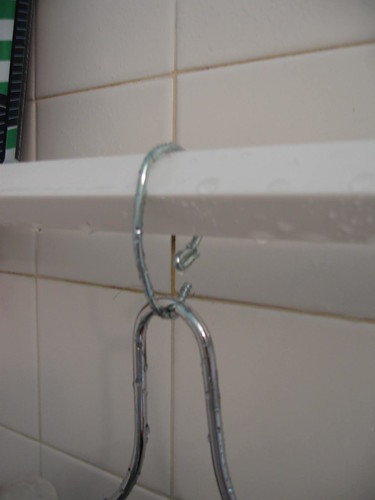
When your bathroom is this tiny, storage is at a premium. Since the Boy and I both like to have a selection of products in the shower, shower storage was even more limited. Shampoo bottles were lining the tub (and falling off every time I showered) and driving me nuts. Luckily, This Young House shared a clever shower storage tip, putting a caddy on the useless in-shower towel rack. The only problem was that I couldn't find hooks that would work to hold it up anywhere.


Luckily the boy is more resourceful. He figured out a way to hang the shower caddy without spending a dime. How, you ask?

By re-purposing part of an old metal hanger. Genius, no?

What might seem like a trivial amount of additional storage has really made a positive difference in my daily showering experience. No more falling bottles, shower scrubbies or other debris equals a happy hus owner!

LinkWithin

Blog Widget by LinkWithin